Saturday, 24 May 2014

Deep

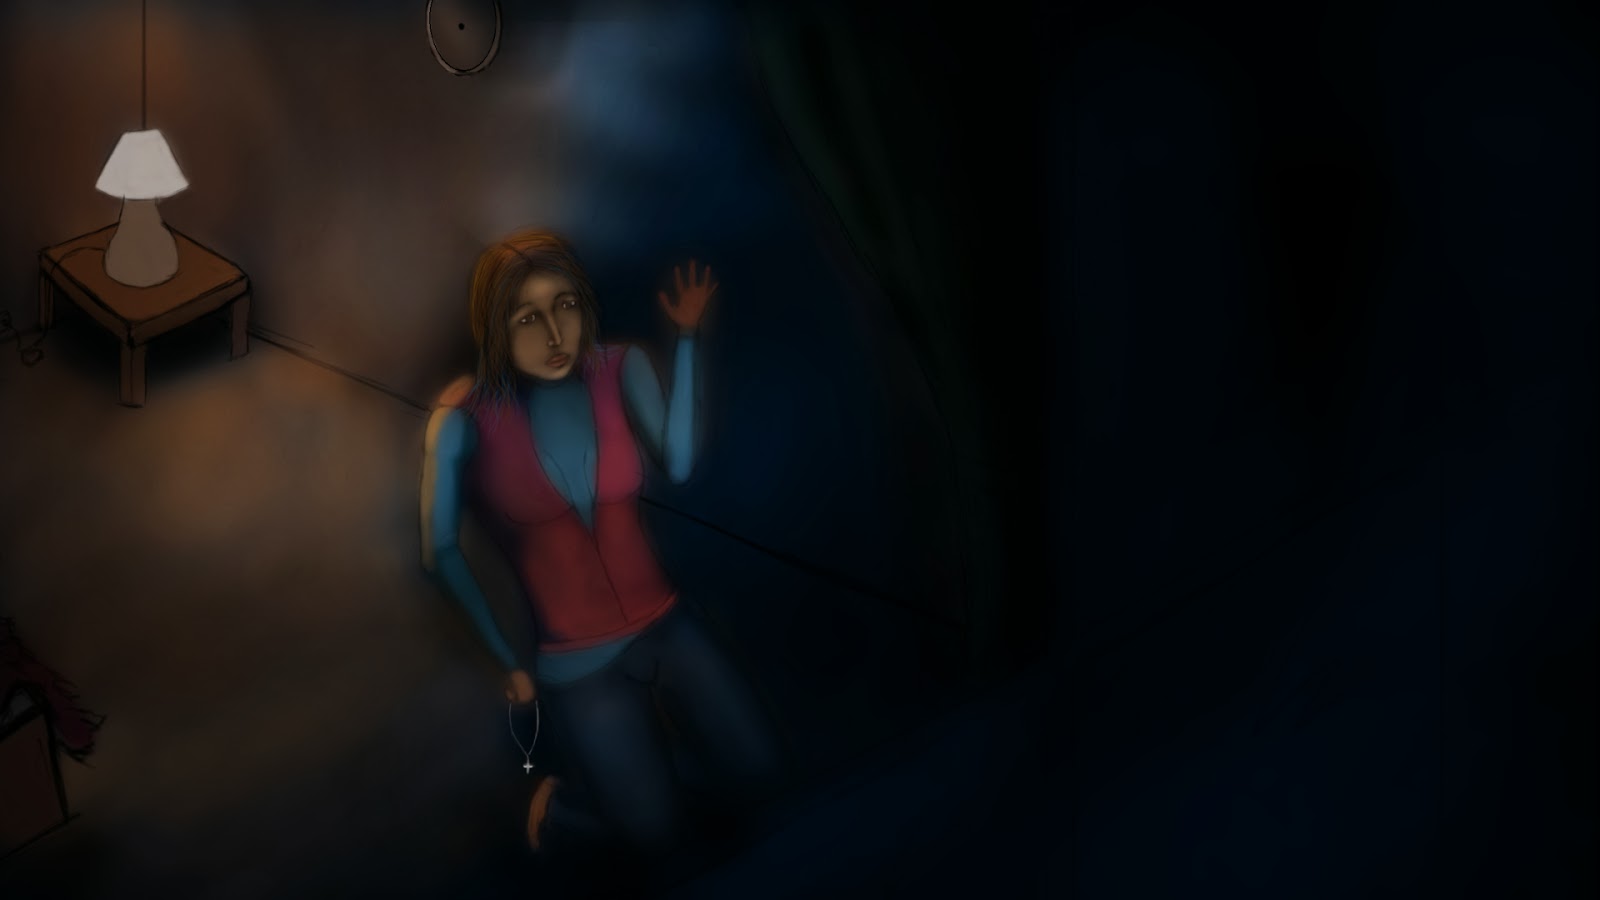
Deep was a short experimental film project. When it was presented to us it was not finished. Since it was part of our Animation Practice module, we had to work on it. At the beginning of the semester we were divided into groups. Each group was working on one or more scenes. At first I had been given the task to work on the nightclub interior scene. My job was to take a rough footage, remove its green screen, run some de-spill operations and composite it with several background. The other members of the group had to create the backgrounds. Since this film was experimental many of the scenes would be created in a different style. Our scenes were supposed to combine 2D animation and live action. While the others were creating the backgrounds and doing the animation, I had to wait for the live action shots to be processed. Due to some issues it took about 3 weeks.  As soon as I took the scenes I imported them into nuke. At first I noticed that nuke has a plug-in called “Keylight”, that I have previous experience with in After Effects. I connected it’s node to the footage and tried to key out the green color.

After a long time of trial and error I was unable to key out the green screen. This was because of several reasons. First of all there was background noise. I could not remove it without cutting parts of the black dress. Another issue was that the dress was very reflective. So it reflected parts of the green screen and lights. When I attempted to key out the green the plug-in automatically deleted all of those parts of the dress. For a while I left that scene and tried to handle another tricky part, which was namely the hair.

This was a big issue, since in many parts of the video the hair was a bit blurred. This made it very hard for me to key. Also parts of the hair seemed to form weird shapes after the rough key. At this stage I decided to try out different techniques to solve this problem. I tried different built in keyer plug-ins, but they we not sophisticated enough to handle this operation. At the end I managed to find “Primatte”. This is one of the foundry’s most advanced keyer. It uses an advanced 3d algorithm to solve keying issues. To begin with I connected it to the footage. Then I picked the green color using the color picker. Afterwards a series of operations followed such as background and foreground noise removal, detail preservation and matte correction. Surprisingly enough this worked perfectly.

There were some issues with parts of the video but, I was able to reduce them by playing around with the settings. The only video that I did not manage to fix was the last one. Here due to dimmed lights the green screen covering the floor could not be removed completely. After this was completed I simply composited the footage with the background images. The color grading was done in After effects. Since I am quite familiar with the program it was easy enough to add some hue exaggeration until the color of the background matched the color of the skin.

This is the final video:


VFX Showreel


This is my final showreel for the VFX module.

Tuesday, 28 January 2014

Thursday, 23 January 2014

Eleven Second Club

For this project we had to work with an audio file from the 11 second club.  We could choose between the November or the December audio. The idea was to animate a character according to the given sound. I choose the December audio file.  Unlike previous audio files of the 11 second club competition, this contained only sound effects. It was a bit challenging however, after a few days I was able to come up with an idea for the animation. My concept was of a ninja that is running on a rooftop, then he slips and falls.  As he falls he hits another roof and falls through that. This is followed by another scene where the ninja is seen to land on a floor of a room. He then stands up and sways from dizziness. Suddenly some bricks hit the ninja, which results in a coma.
At first I did not know what rig I will be using. I even had an Idea of building one myself. However due to the small amount of time I had to use a ready one. After some time searching online I decided to go back to the Eleven Rig. Since the video was about a ninja I had to modify it a bit. This is the rig before and after:


I removed its hair. Then I colored it black leaving the hands, neck and also a small area around the eyes. After this I removed the ears. This seemed to look perfect for what I intended. I then modeled a small stage. I included a running area and a house with a hole in the roof top:


After a while I made a LAV file to help me make the animation. I edited the LAV since, I cannot perform the same actions as intended. After this I imported the sound file in Maya.  It was time to make the pose to pose sequence. The first 2 seconds of the audio file sound like someone is running. So at first I set up a running pose. This is followed by a small slip like sound in the file. I decided that this moment is where the ninja will slip. After this two big “bash” sounds are heard. This was perfect for making the ninja collide with the rooftop and the fall on the floor. In the background, during the same time, a wooden block falling sound can be heard. However to me it also resembled a roof tile falling. So I made some roof tiles fall beside the ninja.  Following in the audio is a silent period and then some footsteps. The silence was perfect for the moment where the ninja stands up. And the footsteps were spaced out enough so that I could get away with the ninja swaying. The final sound was almost like a collapse of a building. For this I decided that the ninja will get hit by rooftop tiles and fall on the floor, followed by other tiles falling around him.
This was the initial Idea however, I had to change the poses a lot since after a while some of them did not seem adequate.  After polishing the poses I made a run cycle for the first scene. This helped me understand how the ninja should run. I also made a falling test to visualize how the bricks would hit him.  I did not use any dynamics for animating the roof tiles. For the style of the animation it seemed better if I make them by hand.  The next thing was to animate the entire character. I did most of the animation using FK, because it worked better, when the character was running and walking.  I concentrated on animating the eyes, since the rest of the face was black. This seemed to work quite well with this character. I then polished the animation and started to build the scene.
For the scene I modeled a very simple building for the ninja to stand on and I placed another one behind him. For the background I used paint effects to create the houses. After this I added a ground plane, which I colored green. In the room I placed a wooden texture for the floor. This I created in Photoshop using the fibers filter.  After all of this was done I made a bump map for every texture. This seemed to give more detail in the background. After this was done I created the roof tiles for the house. The first two scenes were lit with Maya’s sun and sky lighting, the third one by using an area light. The only Editing I had to do afterwards was to add a sky. This was done in after effects by using a ramp gradient.
Overall in my opinion the animation is not that good due to the fast pace of everything. The running scene seems alright, but the final “sway” walk needs to be more believable. On the facial expression part I believe I did alright, since the idea was to make him look confused.

Here is the final video:


Saturday, 12 October 2013

Drawing


Decided to make another drawing. This time I am focusing on darker atmospheres

Friday, 20 September 2013

Saturday, 1 June 2013

Motion Studies


This is my motion studies showreel. It has all the videos I did in the second semester, based on motion amd emotion. I also included some of my life drawings.

Friday, 31 May 2013

Life Drawing

These are some of my life drawings


Sea project Finished

Finally Completed


Production Report

My task for the sea project was to take care of the Background design, the 3d Animations, the music design, and finally the post production. The project required constant collaboration between me and my team mates, frequent meeting to discuss Ideas that can be developed and a lot of research for the actual design and animation.
When we were given the audio file with the man’s voice, the first step was to discuss the format of the animation. Since the main story of the audio file is all about an incident, it was decided that an interview format would best suit our needs. From then on, we began to research animations that were done in the same format. That way we could better understand the mechanism of those types of videos. I stumbled upon the animated documentary “Waltz with Bashir”. At first it seemed like this movie had everything we needed to complete our animation. The subtle colors and tones, mixed with a nice soundtrack, helped this documentary to deliver its story in a unique way. Also, the mixture of 2d and 3d seemed like an amazing, and yet a very challenging Idea.
Next, we each made a storyboard, from which the initial story was starting to develop. We decided to divide the animation into three parts - the first and last being the interview, and the middle being the man’s memory. A problem concerning the middle part was the style of the animation. Since we wanted to present it as a memory, we considered a cartoony look. At the time it seemed to work.
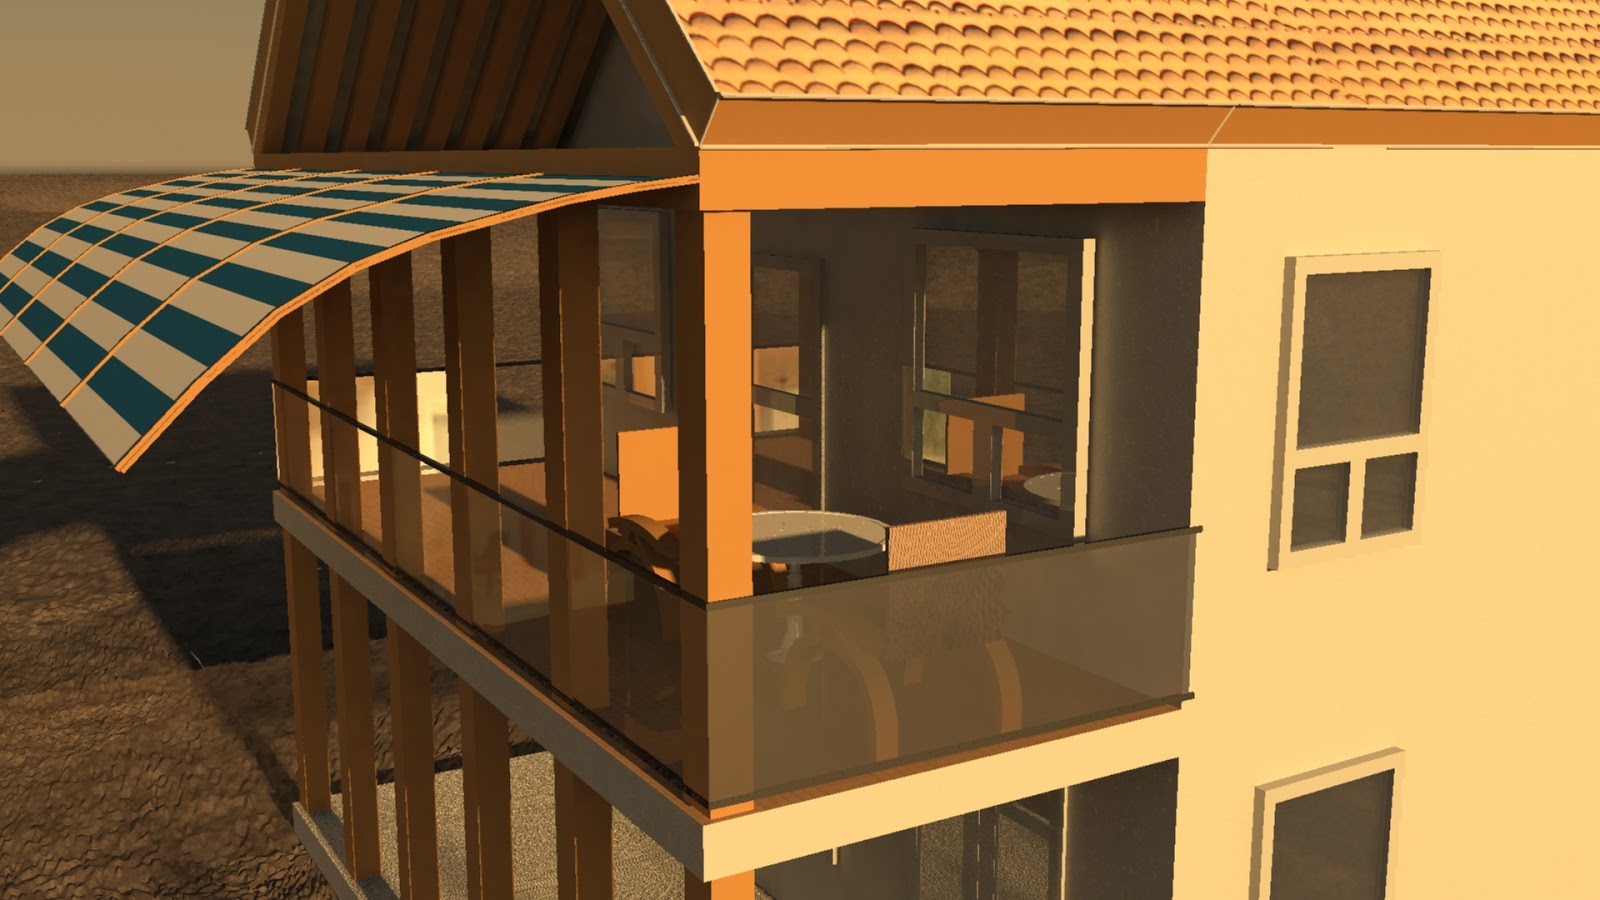
For the first part of the animation, I had to build the environment in 3d. I started by researching different house designs, that were build in almost empty areas. When I found a suitable look, I recreated it as a 3d model. This is the final look:

Afterwards, I thought about the environment. Since the man had a traumatic experience, it seemed logical to place the house in an almoust empty area. At first I tried to make a desert like scenery. I achieved the effect by using a plane in maya, which was shaded. The I added a bump map and a displacement map. After a lot of tweeking the desert started to look quite nicely. In the sound file it is mentioned, that the incident occurred in “Lanzarote”, so I discussed with my team the idea, that the house can be placed on the outskirts of that town. We all agreed on that, so I made a sign saying “Welcome to Lanzarote” and a little road next to it. Further on, in the developing stages of the project, It was decided that the main character should die in the final scene, ironically after saying “ I am lucky to be alive”. We figured out that a good way to do this would be if a crane hits him. I started working on the idea. I placed a crane behind the house and a little construction building next to it. That way in the first scene It seemed like there was a construction going on, but at the end something malfunctiones, and a giant ball(attached to the crane) hits the house. Finally these scenes were rendered with mental ray. For lighting I used the maya sun and sky option. This created the desired color we were looking for.


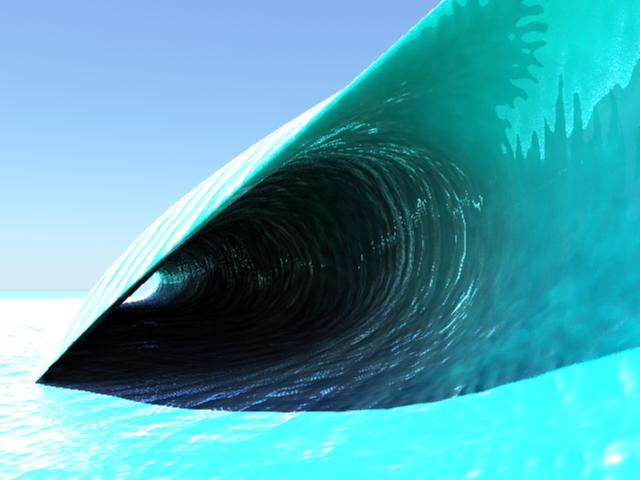
The second part of the video was very tricky to handle. First it was going to be made more cartoonish in a sence, but we did want a nice transition between the interview and the memory. So there had to be a an element of realism. Since the characters were going to be 2d animated, I decided to make the sea look more realistic. At first the idea was to make a normal ocean in maya. Because we had to have violent sea scenes. I experimented with different options like wind speed and velocity. After many tests, the idea did not seem very good. First of all, the motion of the ocean in maya cannot be controlled perfectly. It generates random waves. This would make the task of my team mates immpossible, since they had to animate the characters to the sea. I decided to use maya’s ocean but it was not going to be animated violently. Infact it almost stayed flat. It generated tiny waves and ripples that looked perfect at that time. The biggest challenge that I faced were the waves. I had no clue how to make 3d waves. After a long research I stumbled upon “Surf’s up” – another animated documentary. In their production report, they described how, by using rigs, they could animate almost photorealistic waves. So I started watching tutorials on creating rigs and after a long time, I was able to produce my first rig:

Basicaly, it started from a cv curve in maya. Then I added clusters to all the vertex points. After which I created a small wheel. This was the control for the curve. With the set driven key command, I was able to arange a function, which made the vertex points change there position acording to the rotation of the wheel. After every command was made, I duplicated the curves and lofted them. This created the wave's surface. Although the result was nice, the rig had a large amount of problems associated with it.  Some of them involved the surface collapsing when different parts of the wave were bent. The problem was the poligon surface so I changed it to NURBS and the problem was solved. After a lot of modifications the rig was finally ready. Thise are some renders from the final rig:


After everything was animated and rendered, I used after effects as a tool to aid me in the post production. For the  interview scenes I added a camera effect. This helped to present the scenes better. There was also a lens flare, which boosted the brightness of the sun and created a more idealistic atmosphere. For the transition between the interview and the memory I used the sun’s brightness. I increased it so much that it actually engulfed the whole scene into white light. This worked as an emotional effect as well.
For the sea scenes I had to stylize the waves in order to fit the texture with the already animated characters. I thinks this worked quite well, due to the fact that now the waves had a realistic motion and a cartoony texture. For the sky I used a simple gradient, which fit quite well with everything else. The scenes were the main character fell under the water were key. That is why I concentrated on making them look good. Essentially I added bubble effects, to enchance the idea that the character was under the water. Between the transition of those scenes I kept increasing the dark colors, so that it seemed that the character was going down with no way out. I also added an adjustment layer with a displacement map. This effect was powered by a turbolent noise. That and a lens flare on top, helped to increse the dept of the ocean and created an underwater displacement effect.

The colors of the scene were a transition between light and dark blue. The character was also tinted in those colors. These effects helped to present the scene as a traumatic experience.

During the development precess of the short film we decided to add a soundtrack to the animation. We couldn’t use a copyright piece, so we started to search for something that was royalty free and that would fit in. We couldn’t find anything, due to the fact that the there were a lot of scenes in the animation, which required different emotional presentation. That is why I decided to make the music. I downloaded a free trial of the software mixcraft. This allowed me to use virtual instruments. Since however I had no experience with creating music. I started to search for simple songs that I could recreate. After long hours of practice and going through insperation material. I was able to produce a simple piece which implemented the emotion required for our animation. The sound file with the voice was cut in three parts. This created the required silence needed for the key scenes.

Overall, this animation worked quite well in my opinion considering, the different styles and animation types that we used. My team did a really good job animating all the characters properly. This mixed very well with the sea waves, and the interview scenes.
All in all, this project was a very good experience for me and my team mates. It taught us how to work as a whole, make critical decisions and manage our time.

Friday, 24 May 2013

2d Adaptaion

This is my 2d adaptation


Aftem making the design in photoshop. I transfered evey object on to a new layer. Then I imported it all in after effects. There I turned all the layers into 3d objects. This allowed me to place a camera in the scene and move the layers in 3d space. This created the ilusion of depth. After the initial animation was done I added some particles to the scene and made them look like stylized snow. Overall it worked well, but next time I will have to be able to produce a more detailed scene, in order to improve the whole effect.

3d Adaptation

3d Adaptation using maya


This was quite hard to get my head around at first. At first, the camera move did not work, because I had too many photoshop layers. It was very hard to make many planes, move them around in 3d space and position them just like in the painting. This is why I drastically decreased the number of layers. Now I only had to work with 5 layers (5 planes). So I set up the camera in maya. Made all the necessary adjustments on the planes and started to sculpt the objects. This did not work so well. I think it is because my painting was not very detailed, thus there was not much to sculpt. Overall the animation that I was able to produce is not very good. This is probably due to a lack of skill, but it was a nice experience.

Devil in the detail


I created this using maya and mudbox

This was the first projects that I have ever done, which involves 3d sculpting tools. So I approached it very differently, than other tasks. I just used a plane in maya and then imported it in mudbox. There the whole process took place. I guess it took more than a day to complete it but it was worth it.
Despite the final result was satisfying, there are a number of problems with it. First of all when I applied the textures, it did not look as it should. The texture made it look more chromatic than rocky. Second, the bump texture that I used made a lot of useless detail. To solve this problem I tried to apply two of the same textures and then play with their opacity. I also tried to paint out some of the detail. To a degree it worked, but still it did not seem right. After sculpting the piece I tried to paint the areas beneath the rocks with black. So it could seem more realistic. But again the result was not satisfying. In the end I imported the object in maya and created some lights. The object was looking much better, because now there was more contrast. Overall the result was not that bad, considering I am sculpting for the first time, but it can get better.
3D Adaptation

Ident

This is my Ident

I made this Ident using photoshop and after effects. First I drew the brain, eyes, nerves and hands into photoshop. I was able to achieve a nicely looking style for all the drawings. After that was completed I imported everythig in after effects. There I rigged the brain. This was done by using the puppet tool. Every point of the mesh was connected to a null object, through a simple expression:
"n=thisComp.layer("name of layer");
nullpos=n.toComp(n.anchorPoint);
fromComp(nullpos);".
This allowed me to make a hierarchy and essentially have more control over the brain and eyes. In some parts, the eyes were controled with a simple "wiggle" expression, but in others were controlled by keyframes.
For the liquid I used the "Mr Mercury" effect. In the end it seemed like a nice video. The only thing in my opinion that did not work out so well, was the transition between the squeeze and the logo.

Friday, 10 May 2013

Walk Cycles

Here are my walk cycles with performance.

Macho walk

Bad mood walk


Good mood walk


After finaly learning the diffrence between IK and FK, I was able to make these walk cycles more realistic.

Wednesday, 1 May 2013

Sea project

The biggest project this term is called " the sea project ". Basically we were devided into groups. Each group received an audio file, for which we had to make an animation. I will try to make regular post and keep you updated on how the project is going.

First of all, the project is all about sea rescue stories. In our audio file a guy talks about how he almost drowned in a strong sea current. So we decided to to split the animation into 3 parts. The first will be in his house where people will interview him. The second will be taking place in his memory, and the third will finish  again as an interview.


We started brainstorming on the subject and we were able to create this animatic:

We then decided the task for each person in the group. I had to do all the background and also the sea animation .The style of the animation will be very tricky to create, because for the first scene we are going to use a "Waltz with Bashir" style.

And for the second one a more cartoony look


For the first scene I came up with this environment:


For the second scene the waves were quite a problem. At first I decided to the ocean dynamics in maya. But it did not workout very nicely, because I did not have enough control over the waves. So I started to look for other solutions. In my reserch I came across a video that shows how the waves in the animation "Surf's up" were achieved.


I really liked the Idea, but I had no clue of how I was going to achieve the same animation. I red the the entire production report on "Surf's Up", where I got a better sence of the rig they used. Next my reserch turned towards different ways of how to create rigs. It was a long way but I think the final result was worth it. 

Friday, 26 April 2013

Background images

These are some imags that I used for the background project


\


This project was very hard for me, because i dont have any experience drawing backgrounds or things of that sort. That is why I mostly used photoshop, to create them. It seemed to be easier working with digital paint, because of all the configurations and effects that could be applied. Overall I dont think I did a good job on this project, but I definately tried hard


Friday, 19 April 2013

Experimental animation final


This is the final version of my experimental animation.

Experimental Animation Production Report


Experimental Animation Production Report
After the Easter break I decided to start on my experimental animation project. This is the first time I have ever done experimental animation. That is why I decided to go with a technique that I would feel most comfortable with and that is namely pixilation.

To begin with, I started doing some tests. The first test involved some coins.

I placed the camera just near my desk. Then I slowly started to introduce the coins in the frame. I started to move the coins in different ways and at the same time, tried to capture every important move as a separate frame. The first few tries did not work out quite as I expected, because there were not enough frames to make the movement more fluid. So I started to do the movements slower and was able to capture more pictures.
For the next test I used a handkerchief.

This time I wanted to try making some waves by deforming the cloth. I think the hardest part about this test was making sure the waves stay consistent and don’t spread unnaturally. In the end it did not work out as I expected but still the effect I achieved is better than nothing.
For the third test I used paperclips.

I decided to make them move in a slightly chaotic way and I was able to achieve some nice effects. I do feel quite happy with this one because, I made some nice shapes with the clips. Also I was able to make a snake-like form by attaching the paperclips to each other.

After finishing the three tests I had to start working on the final piece of animation. For this one I had to use a specific soundtrack. I was thinking of making something similar to the previous videos, but when I started to listen to the soundtrack more thoroughly I decided something else. I made a decision to make an animation about a drawing. The soundtrack sounded very soothing, so it seemed natural to make a simple piece of animation.

At first I was thinking about drawing on film. However the frame of the film was too small to draw detail. This is why I got some toilet rows. At first it seemed like a crazy idea, but when I thought about it more it seemed good enough. I wanted the paper to behave just like film. But it didn’t work out. So I decided to make some footage of a spinning toilet row. Then I made it loop and placed it just on top of the frame on which I was going to draw. After that I decided to draw very slowly and also take a picture every time there was more progress. I also captured my hands on the first frames and made the animation as if I started the drawing and then it finishes by itself. I repeated the same with the painting. In the end I had the raw tiffs. So I imported them into After Effects and made them into a sequence. After that I added the soundtrack .In the end I added an old movie effect and tinted the footage. Then I applied a mask so that when the painting part comes the tint would be removed. I enjoyed doing this piece of animation. The final result, however was not satisfying. I guess it could have been a lot better. But still as my first time It worked.